Selenium is a free open source tool as well, created in 2004. It uses injected JavaScript to work within real browsers. Different components exists under the name Selenium: Selenium Core, Selenium RC, Selenium IDE (!), … In this blog post I will only consider Selenium RC used with Selenium IDE on Firefox.
Selenium Installation.
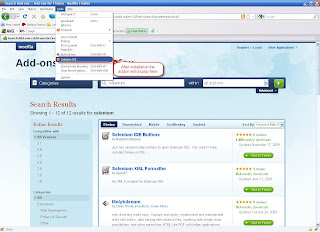
Open firefox and goto the firefox addon site.

Select the add-ons and click install to install them. After installation, restart the firefox.
After installation, in firefox add-on dialog box the add-ons will be available.
Recording test scenarios
- Open the selenium IDE from the firefox.
- By default the record button will be enabled, if not click the record button for recording.
- Take a sample example for recording like search the selenium tool in google.
- Open google on URL (www.google.com).
- Write down "add on on firefox" in the search dialog box.
- It will show the list of results. Select the URL https://addons.mozilla.org.
- It will take you to the mozilla add on site.
- Search for selenium in the add on search box.
Selenium IDE will record all these processes.
- After saving the file, open it in any editor like WordPad, editplus or notepad++. For this blog we have used editplus to edit the java file.
- After opening the file you will find a java class with two methods.
testSeleniumSearch()
- You can find the class extends SeleneseTestCase, which contains the necessary methods to run the selenium.
- setUp() method configures the selenium. It defines the baseURL and browserType.
- testSeleniumSearch() methods contains the actual code for the whole processes done in the browser.
Eclipse Setup for Selenium
Here is a small description howto setup Eclipse and run Selenium script through it.
1) Download Eclipse IDE from http://www.eclipse.org/downloads/ 2) Download Selenium RC from http://seleniumhq.org/download/ 3) Download Junit from http://www.junit.org/ 4) Create new project in Eclipse:
- Go to File -> New -> Java Project
- enter project name e.g. “Sample”
- Click “Finish” button
5) Create a folder "lib" and paste the required jar file into it.
6) Add the jar files into project build path.
- Right click on project and select build path and choose configure build path.
- Click “Add JARs” and select junit-4.7.jar and selenium-java-client-driver.jar and click Ok
7) Create two packages under the project
i) For configuration (e.g. "com.selenium.config")
ii) For testcases (e.g. "com.selenium.testcases")
8) Under configuration package create a class to configure the selenium.
9)Under testcases define your own code to run the testcases.
Start Selenium Server
1) Download the selenium RC (Remote Control) server from here.
2) Extract the folder and open command prompt.
3) Navigate to the folder (e.g. cd ).
E:\selenium-remote-control-1.0.1-dist\selenium-remote-control-1.0.1\selen
ium-server-1.0.1
4) To start the server write the following code in the command prompt.
java -jar selenium-server.jar
5) Then the server will start with the default port no 4444.
Execute the Testcase.
1) After server start, right click on the
testcase file
and choose Run As -> Junit Test. This will start the browser and execute the code.
Enjoy guys........ :)


